 |
| These pictures do not do justice to how ugly this table was, but it had potential. |
 |
| Lots of ugly red and yellow crackle paint. Yuck. |
But, I'm actually really glad I didn't just finish it the way I was originally thinking I would so many years ago since I came across such a neat idea on Pinterest a few weeks ago. (If I knew how to be fancy and link it, I would.... if you follow me on Pinterest, you'll see the pin though.)
I dragged the table upstairs (and out of the pile of cardboard boxes that house most of my crafting supplies) and started sanding off what I'm pretty sure was lead paint. I started with a palm sander that had pretty light-weight grit paper on it, and the paint wasn't even budging, so I called my husband and asked if there was heavier paper for it, or something else I should be using. He suggested some heavy duty paint stripping chemical that he had, and I went to work on that. Now, luckily, my brother-in-law was visiting and pretty bored that day, so after the chemical sat for a while, he grabbed a scrapper and helped me scrape off the paint for the next few hours. Whoever owned this table before me had stained it with really goopy stain, painted a few coats of exterior (lead?) paint, a few coats of the gross yellow paint, the crackle finish, and then some varnish. There were some serious layers to this table.
We scraped and scraped, and sanded and sanded, using the palm sander more, a belt sander, sandpaper, and a little dremel sander. Literally my whole day was spent on stripping this table. (Thanks for the help, Brian!)
 |
| The beautiful natural wood underneath the layers of paint. |
 |
| Pattern that I hand-painted on the middle section of the table. |
I was hesitant to do the next step since the table was looking so nice already, but the light wood just really wasn't what I wanted for the space, so I took a deep breath and put on ebony stain right over the hours of sanding and painting.
 |
| This isn't a great picture, but you get the idea of what it looks like. |
 |
| Again, sorry about the poor pictures. The garage doesn't have optimum lighting. |
 |
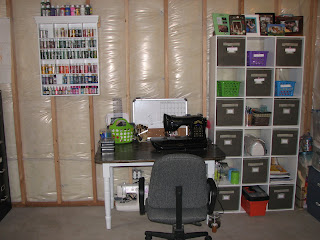
| My sewing machine's new home! |
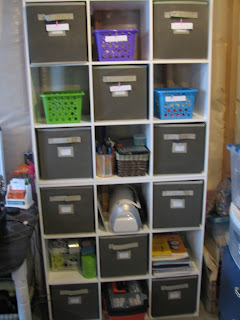
I mentioned earlier that most of my crafting supplies were stored in cardboard boxes.... Except for my scrapbooking supplies, everything else has been kept in boxes from when we moved into our house. It's really a pain to get to whatever I need and I never meant for it to stay that way for so long, but sometimes there are just more important things to do than finding a suitable home for things you use only a few times a year. My mom was awesome enough for Mother's Day to spoil me with some storage cubbies for all my crafting/quilting stuff.
 |
| Add caption |
The rest of the cubbies house painting, drawing, stamping, cricut-ing, clay, stationary and hair flower making supplies.
I then, to my husband's great delight, went the extra mile and organized all our bookselves and purged them of books that we were never going to read again or simply had outgrown. And I organized all my fabric by colour, and got rid of scraps that were too tiny to do anything with, and fabric that I had been given that I just honestly wasn't ever going to use.
 |
| Fabric in the bins on the left, books arranged by owner, use and subject. |
Next weekend we're thinking of tackling the mountain of tote boxes in the basement.... I'm looking forward to having a functioning basement that isn't just for storage even if it is just unfinished (though framed!) space. Meanwhile, I get to keep looking/dreaming about what the bathroom, kitchenette, and den area will look like when it's not only concrete floors and 2x4s. :)
Have you done any fun or long-overdue projects lately?


No comments:
Post a Comment